Lowest Price Guarantee. Learn More

SKU: 00-115

Infinity Tools 8-Pc. Prof. Picture Frame Router Bit Set

7% off
Sale price $289.90 Regular price$310.10

The Infinity Tools 8-Pc. Professional Picture Frame Router Bit Set gives you everything you need to mill custom picture frames and gallery-quality moldings on your router table. With eight versatile 1/2"-shank carbide bits — edge bead, round nose, V-groove, cove, three roundovers, and a bowl & tray bit — you can combine profiles to create an almost unlimited variety of frame designs. These are bits you'll reach for far beyond frame-making, making this set a workhorse addition to any router bit collection.

Design your own picture frame profiles

Frame moldings are simply layered combinations of basic profiles. By mixing the edge bead, coves, and roundovers in this set, you can reproduce classic and contemporary frame styles or invent your own. The set is ideal for framing prints, paintings, photos, mirrors, and shadow boxes, and the same profiles work beautifully for general edge treatments and small moldings around the shop.

What's included in the set (00-115)

Item Shank Description Large Diam. Carbide Height
02-500 1/2" 1/8" radius Edge Bead 7/8" 3/8"
14-564 1/2" 1/8" radius Round Nose 1/4" 5/8"
15-690 1/2" 90° V-Groove 3/4" 5/8"
37-850 1/2" 1/2" radius Cove 1-1/2" 5/8"
38-754 1/2" 1/4" radius Roundover 1" 1/2"
38-817 1/2" 3/8" radius Roundover 1-1/4" 9/16"
38-880 1/2" 1/2" radius Roundover 1-1/2" 3/4"
51-502 1/2" Bowl & Tray 1-1/4" 5/8"

Key specifications

  • Bits included: 8 carbide router bits (set 00-115)
  • Shank size: 1/2" (all bits)
  • Cutting material: Long-lasting micro-grain carbide, re-sharpenable
  • Best used in: A table-mounted router for accuracy and safety

Pairs well with

For repeatable, splinter-free frame stock, run these bits in a router table package and pair them with our edge-forming router bits and architectural molding bits for even more profile options. Browse all of our specialty router bits to expand your design possibilities.


Frame-Making Router Bits

Making beautiful picture and mirror frames is easy with this select collection of Infinity Cutting Tools router bits. These bits work perfectly to make any component of your picture or mirror frame. These premium quality cutters can also put decorative edges on fire place mantels, chair rail molding, or even use multiple bits for an extra tall custom crown molding project. Make sure to choose the 6-Pc. Master Frame Making Set and get all of the router bits you'll need to make your next custom frame project a success!


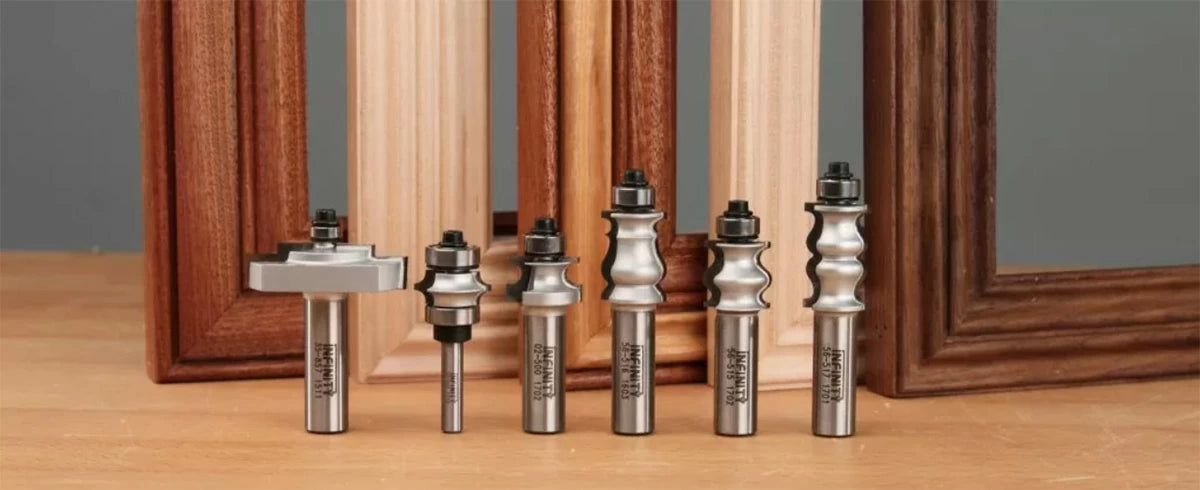
Infinity Tools' Master Frame Making Router Bit Package 00-516 Has Everything You Need
Infinity Tools' Master Frame Making Router Bit Package 00-516 has everything you need.

Any project that requires accurate miter joints can be intimidating, but a one-of-a-kind picture frame can be well worth the effort. Let me take you step-by-step through my process for designing and building picture frames. In this blog, I will show you how to get tight, well-fit miter joints, and how to create unique frame profiles by combining different router bits.

When it comes to designing a frame there are a lot of options, so lets start with the most important part — the back-side rabbet.
An Infinity Tools Stepped Rabbeting Router Bit 35-857 is a great choice for framing because it creates a dedicated rabbet for 1/8
An Infinity Tools Stepped Rabbeting Router Bit 35-857 is a great choice for framing because it creates a dedicated rabbet for 1/8" thick glass.

This is usually the last step I do before cutting my miter joints, but it is worth thinking about early on. What is it that we're framing? How thick are all the parts that the frame needs to hold? Will it include glass or a backer? If we know at the start how thick the stuff inside is going to be, then we can gain an idea of how thick the wooden frame needs to be to hold it all.

After we figure out the function, we can decide how the frame is going to look. The sky's the limit, here. In our shop at Infinity Tools, we've put together a few great sets of router bits that are perfectly suited for making a wide range of frame designs. To make your design decisions easy, here are five of my favorite picture frame profiles that can all be made with the Infinity Tools Master Frame Making Router Bit Package (item 00-516).
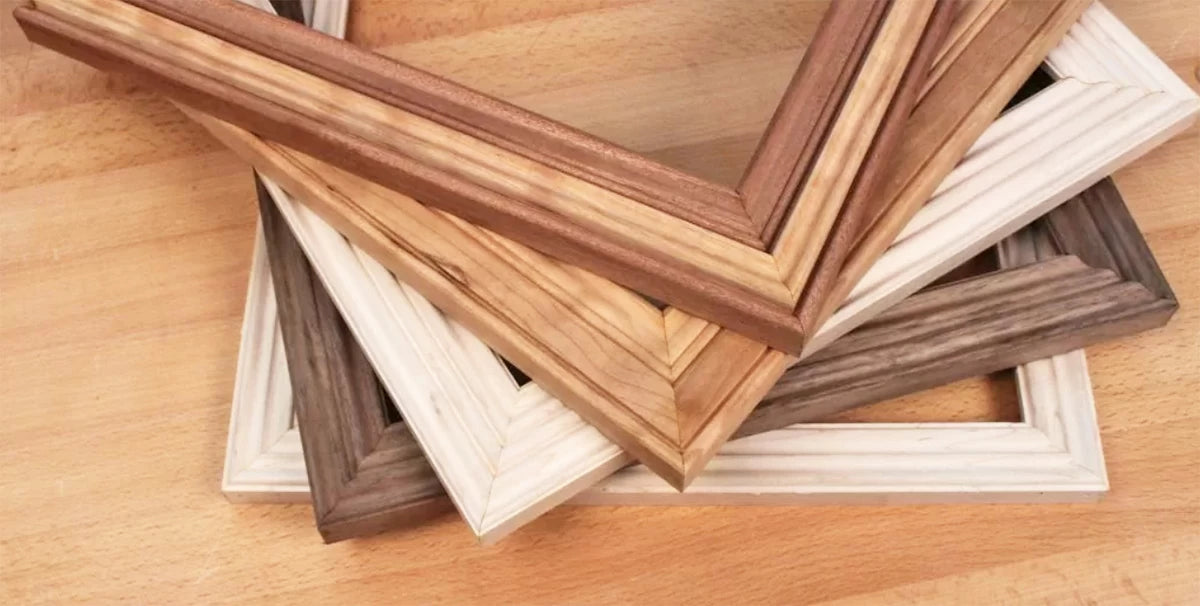
All five of these frames were made using the Infinity Tools Master Frame Making Router Bit Package item 00-516

The first frame can be made with a single Picture and Mirror Frame Making Router Bit (item 56-517). In a single pass, you can produce the profile and then run over the back with the Stepped Rabbet Router Bit (item 35-857) to create the rabbet on the back.
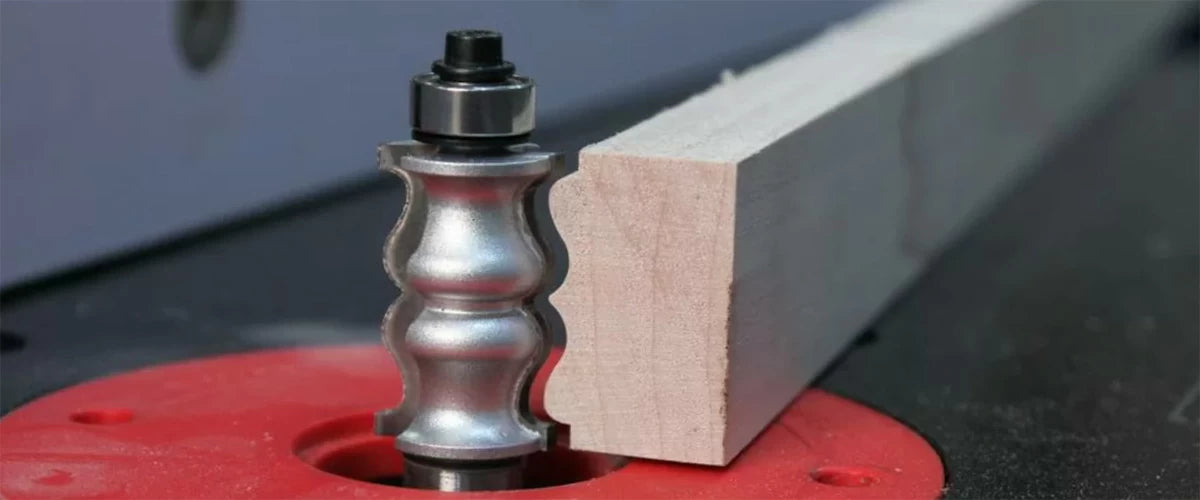
The 56-517 picture framing router bit is a great choice for simple frames made with a single pass through the router table.

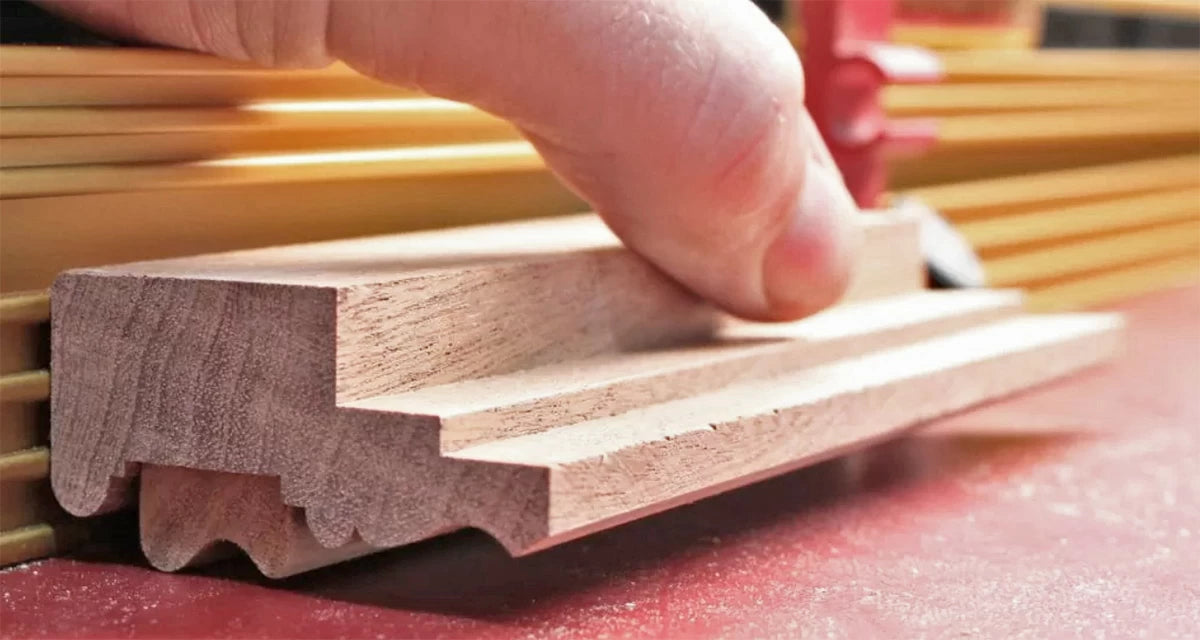
I like to use the Infinity Tools Stepped Rabbet Router Bit for picture frames because it produces two steps. The first step is 1/8" deep by 3/8" wide so it's sized just right to hold a 1/8" thick pane of glass. The second step is an 3/8" wide, and will the subject of your frame inside nicely. The great thing about this arrangement is that you're less likely to damage the glass when securing the picture in place.
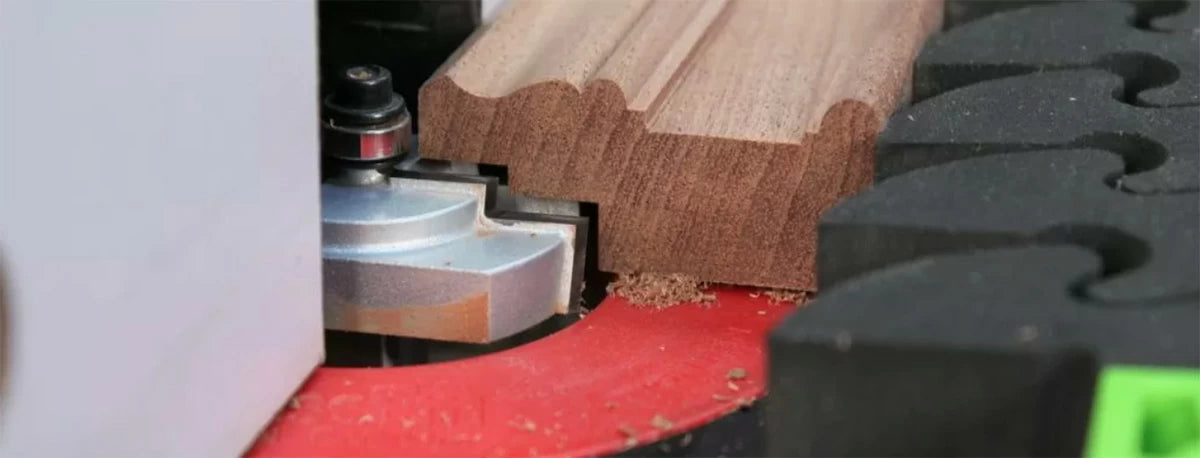
The unique Infinity Tools Stepped Rabbet Router Bit 35-857 makes a dedicated rabbet for the glass which protects it from potential damage from fasteners used to secure the picture into the frame.

The next frame uses a single 56-515 Picture and Mirror Frame Router Bit, but requires 2 passes. To make this frame I set the bit height, make my first pass, then flip the workpiece over and make the second pass (see image below). The key with this frame is to make sure the frame width is double the height of the router bit minus any part of the router bit profile you want to overlap.

The third frame uses the same 56-515 Picture and Mirror Frame Router Bit, but we'll add an extra element. Here you'll still make two passes over the router bit, but you'll also create a bead between the two profiles with the Infinity Tools' Full Bead router bit (item 39-001). This creates a stately little bead down the center of the frame, adding interest to the piece without adding much complexity to your setup.

The next frame is fairly simple requiring a single pass through a 56-516 router bit and a single pass through an 02-500 edge beading bit. It's great for wider frames because the flat portion in the center of the bit can be adjusted to suit your taste. My frame has a 5/8" flat portion in the middle.

The final frame is the most complex, but it's actually fairly easy to make. Start with the same  router bits and process as above, then, using the 56-515 Picture and Mirror Frame Router Bit profile, you'll cut a separate strip that will be inlaid into a groove in the face of the frame. The 56-515 router bit fits for the inlay strip because it has 5/8" wide profile that will fit snugly into the groove we'll make down the face of the wood.
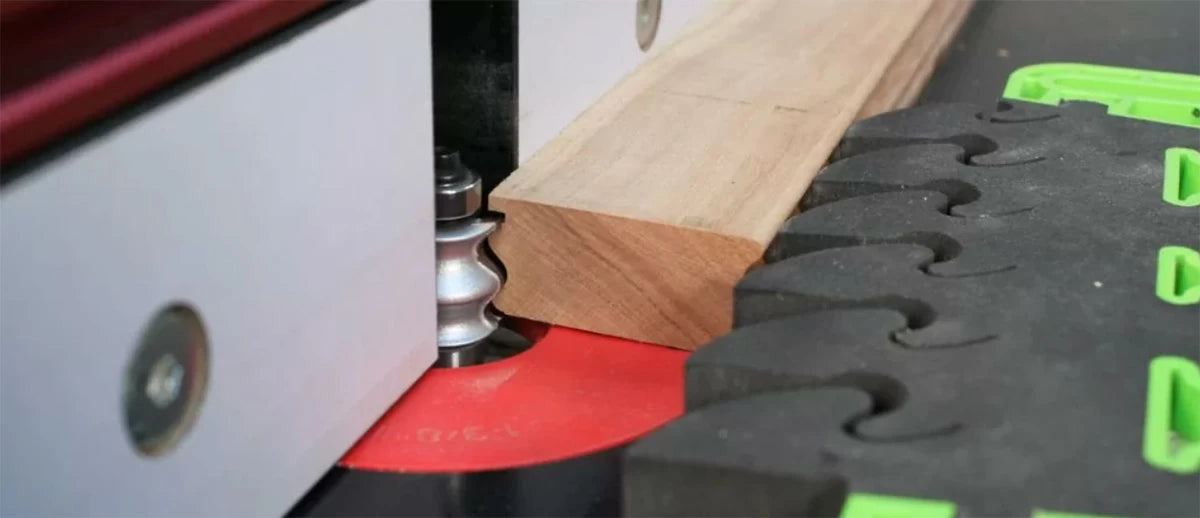
The Infinity Tools 56-515 Picture and Mirror Frame Router Bit makes a 5/8
The Infinity Tools 56-515 Picture and Mirror Frame Router Bit makes a 5/8" wide profile that will be inlaid in to the wider frame.

Once the faces of my frame are made, I head over to the table saw and cut a 5/8" wide dado for the strip to fit into. Once again, my Infinity Tools Dadonator 8" Stacked Dado Saw Blade Set (item SDB-800) has a chance to shine!
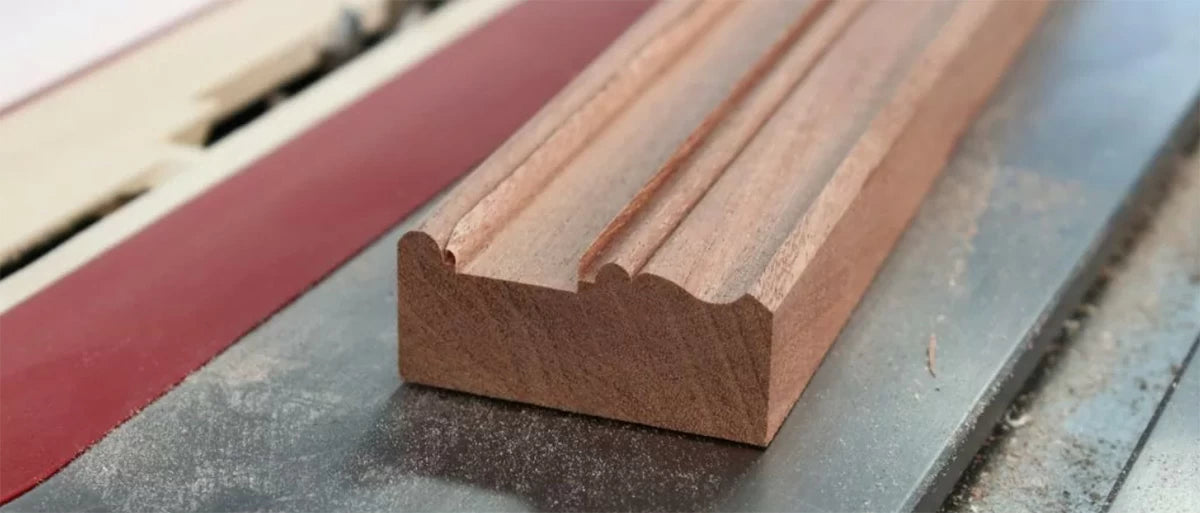
The Infinity Tools Dadonator 8
The Infinity Tools Dadonator 8" Stacked Dado Saw Blade Set (item SDB-800) does the best job of producing a beautiful flat bottom dado that will receive the profiled inlay.

Once the faces of my frame are made, I head over to the table saw and cut a 5/8" wide dado for the strip to fit into. Once again, my Infinity Tools Dadonator 8" Stacked Dado Saw Blade Set (item SDB-800) has a chance to shine!
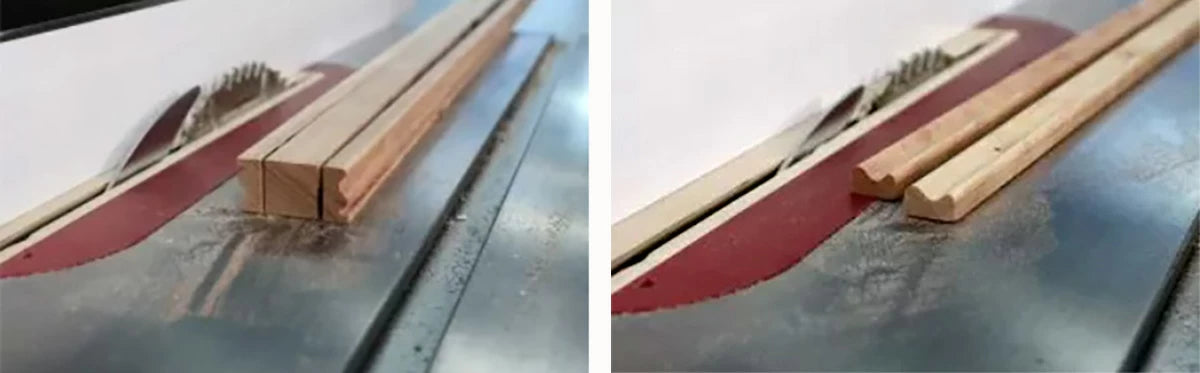
The Infinity Tools Dadonator 8

If you want the inlay strip to really pop, try using a contrasting species of wood. With the right color combination, you could just leave the inlay square and drop it straight into the dado. This is a really handy trick when you want a really wide frame.
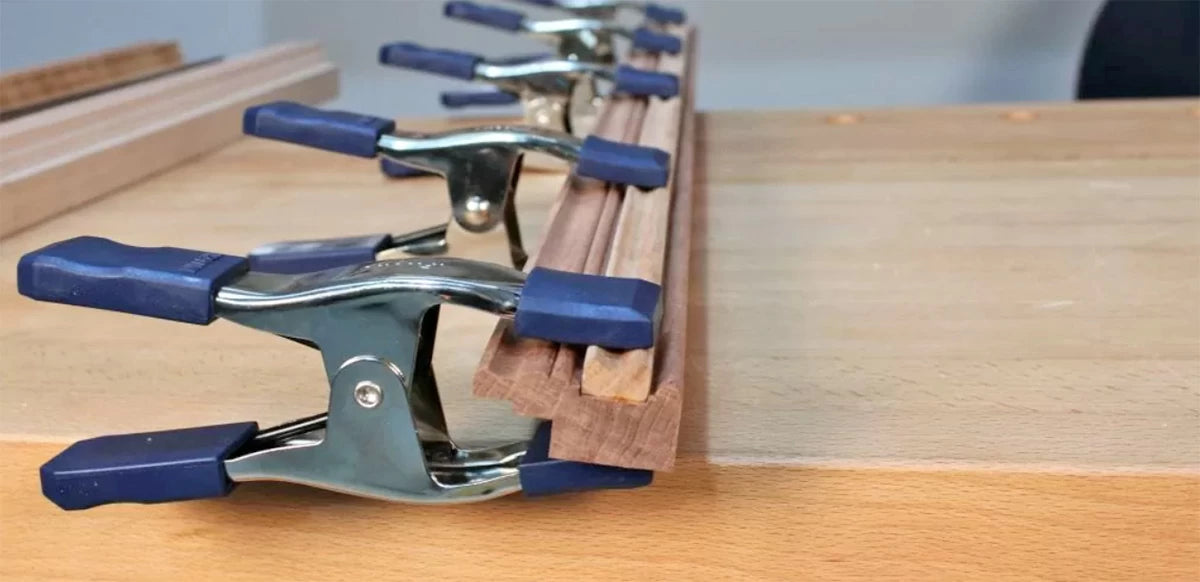
I used Titebond Type II Premium Wood Glue to secure the inlay in place and a few Irwin 2
I used Titebond Type II Premium Wood Glue to secure the inlay in place and a few Irwin 2" spring clamps are perfect for this type of clamping.

Regardless of how good your frame stock looks, if your miters don't fit together the frame will not look professionally made. For picture frame miters I actually pass on the miter saw and head over to the table saw. There I'll either use a quality miter gauge an adjustable crosscut sled. The Incra Miter 5000 Table Saw Crosscut Sled (item IMG-005) is my first choice for making this kind of precise cut because it allows me to get a very accurate miter and set up stopping blocks for repeatability in my cuts.
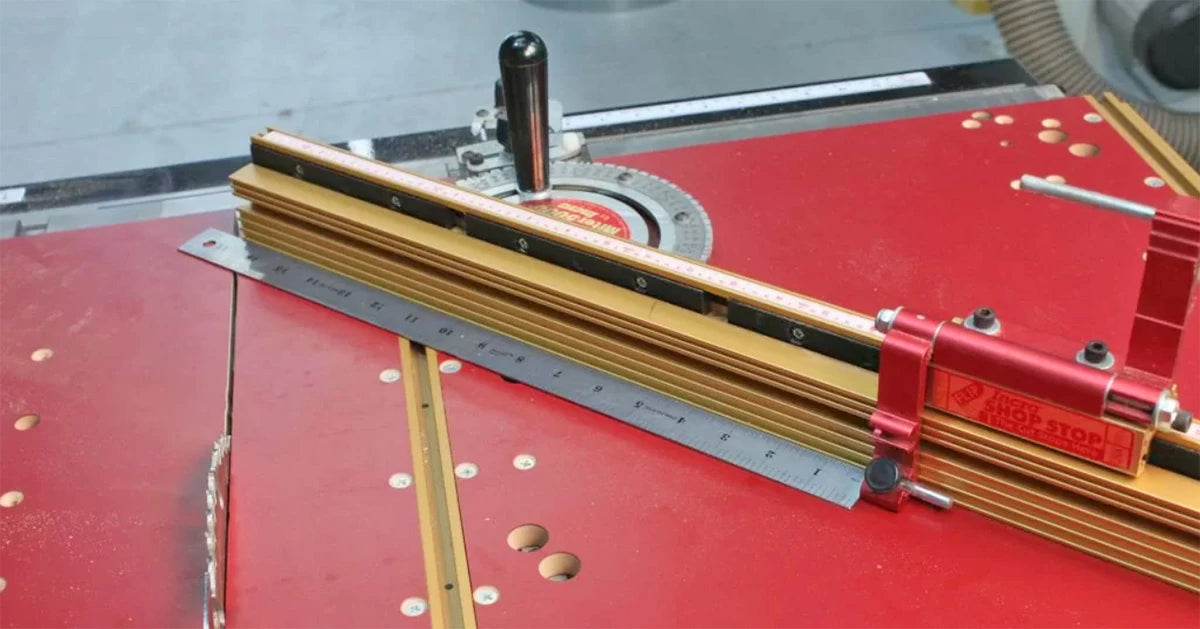
The Incra Miter 5000 makes it easy to get accurate 45° cuts. The flip up stops help make all the pieces of the frame exactly the same length - two functions you really want to have handy to achieve tight fitting miter joints.

Referencing your cuts off of your sled's stops is important. You can make perfect 45° cuts all day long, but if your right and left pieces are not exactly the same length your miters will not fit together perfectly. The same goes for the top and bottom.  Whether you use the Incra Miter 5000 or a homemade sled, take the time to dial in your stopping blocks. I use the head of my 6"Combination Square (item 100-124) to ensure my sled is set to a perfect 45°. It's also handy for double-checking that my miter fence is square to the table.
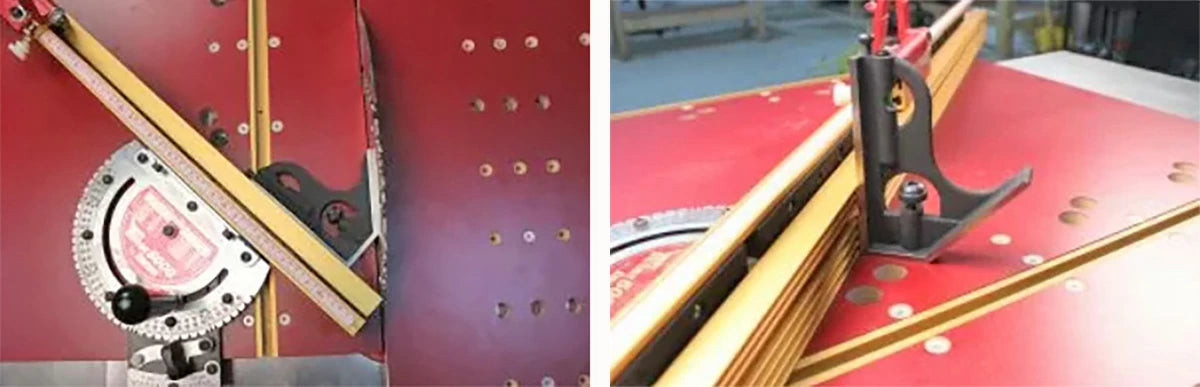
The Incra Miter 5000 makes it easy to get accurate 45° cuts. The flip up stops help make all the pieces of the frame exactly the same length - two functions you really want to have handy to achieve tight fitting miter joints.

I used a few pieces of painter's tape to shim my fence to the stand at a true 90° angle to the table. I also manually set my fence to 45° to the blade to ensure a perfect corner. To round it off, I also double-check that the blade is set at 90° (better safe than sorry).
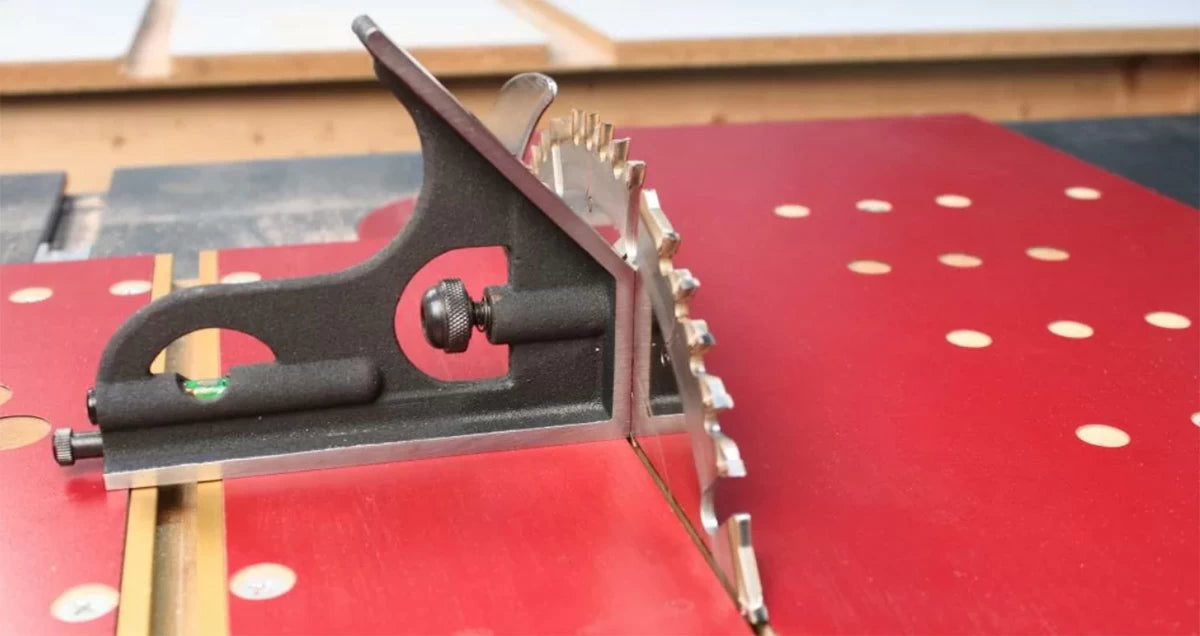
You can't beat a combination Square for this type of setup work. Most times, you can take off the ruler and just use the head of the square.

When I go to cut my pieces I make one cut, then flip the workpiece over and slide it against the stop and cut the other end. Then I cut the corresponding piece in the exact same manor. The Flip-up stop on the Incra Miter 5000 Table Saw Crosscut Sled makes this so easy you don't even have to think about it.
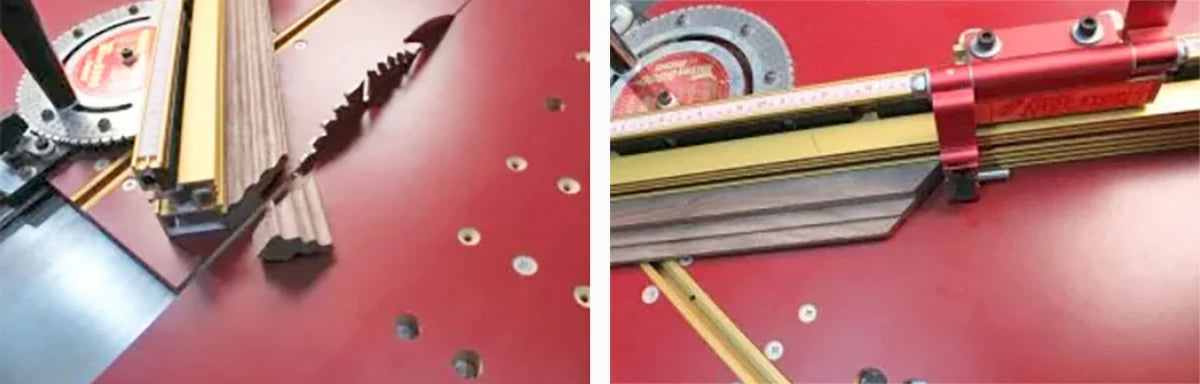
You can't beat a combination Square for this type of setup work. Most times, you can take off the ruler and just use the head of the square.

If I am making multiple frames of the same size I cut all the pieces to the same length, then I reset my stop and cut the rest. This ensures that all my pieces are exactly the same length, which -not coincidentally - also ensures that all of my frames will be square when joined together.

It is never a bad idea to make a few test cuts before cutting your frame stock to length. Putting two 45° pieces together and checking them for squareness will double any angle errors present, which means you will be better able to notice any flaws before your final glue-up.

With all pieces cut, its time to assemble. There are a lot of corner and frame clamps on the market, but I like a clamp that secures the entire frame at once and gives me room to pin the corners with a brad nailer. An Adjustable Four Corner Frame Clamp (item 100-595) works like a dream because I can make sure all four corners of the frame are just right before gluing and pinning.
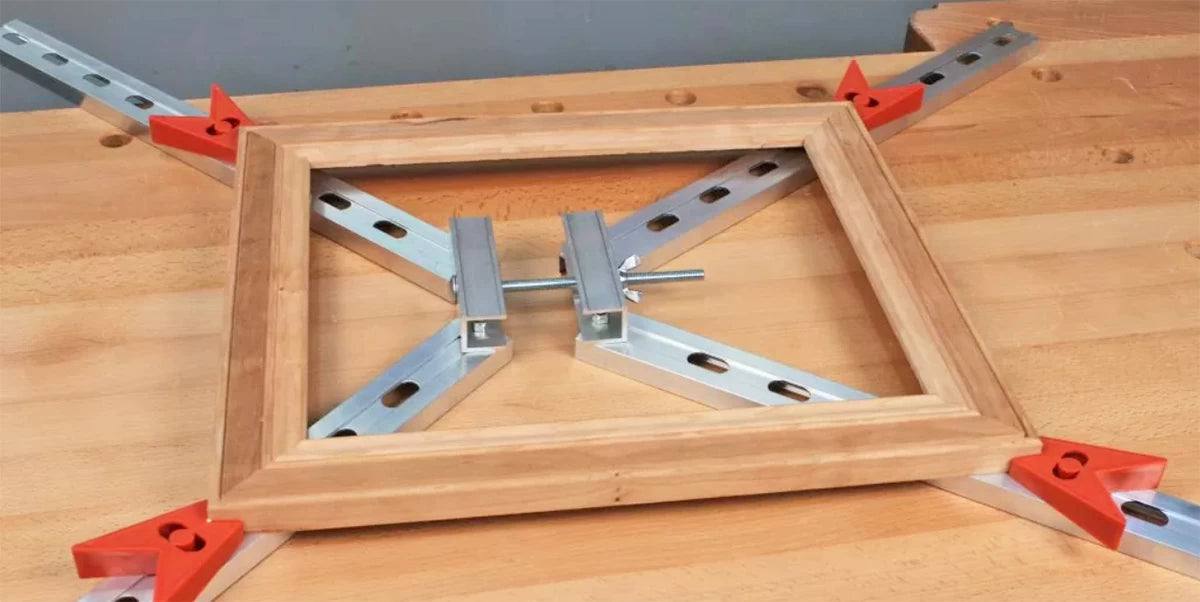
An Adjustable four corner frame clamp is the perfect choice for this type of project because it allows the corners to be pinned with a brad nailer. This allows you to remove the frame from the clamp while the glue dries.

The nice thing about this method is a lot of clamps can be assembled in a hurry. Once the frame is glued and pinned it can then be removed from the clamp, freeing it up for the next frame you want to assemble. There are few things in life I hate more than tying up my clamps just because I'm waiting for glue to dry.

If you pin the corners with a brad nailer, the frame can be removed from the clamp and set aside while the glue dries. It also means you can wipe the entire joint down with a damp rag to remove excess glue while it is still wet.

The final step is to grab a damp rag and wipe away the excess glue. This is a step you do not want to skip because it is a real pain to try and sand away dried glue in all of the tight corners of a picture frame. Once the glue is dry you just need to apply your favorite non-toxic wood finish, install your glass, and some artwork to your newly assemble work of art.


Frequently Asked Questions

What router bits are included in the 8-Pc. Picture Frame Set?

The set (00-115) includes eight 1/2" shank carbide bits: a 1/8" radius edge bead, a 1/8" radius round nose, a 90° V-groove, a 1/2" radius cove, three roundovers (1/4", 3/8", and 1/2" radius), and a bowl & tray bit. Combine them to create custom frame and molding profiles. See more in our specialty router bits.

What shank size do these picture frame bits use?

All eight bits have a 1/2" shank, which provides maximum stability and a smoother cut for profile work. Use them in any router that accepts a 1/2" collet. Browse more 1/2" shank router bits.

Do I need a router table to make picture frames with this set?

A table-mounted router is strongly recommended. It lets you guide narrow frame stock safely against a fence for consistent, repeatable profiles. See our router tables and packages.

Can I make moldings other than picture frames with this set?

Absolutely. The edge bead, cove, and roundover profiles are equally useful for small moldings, trim, box edges, and general edge treatments. Pair them with our architectural molding bits for larger profiles.

What kind of wood works best for router-made picture frames?

Stable, straight-grained hardwoods such as cherry, walnut, maple, and oak machine cleanly and hold crisp profiles. Mixing species can create striking frames. Finish them with a protective topcoat from our oils and waxes selection.

Are these carbide bits, and can they be sharpened?

Yes. Each bit is tipped with long-lasting micro-grain carbide that holds its edge and can be professionally re-sharpened multiple times.

How do I combine these bits to create a frame profile?

Frame moldings are built by routing one profile, then another, along the same edge or face of the stock. For example, a cove on the inner edge plus a roundover on the outer edge creates a classic frame. Experiment on scrap to design your own look.

Is this set good for beginners?

Yes, as long as you use a router table and practice on scrap first. The included profiles are forgiving and versatile, making it a great way to learn profile and molding work. New to routing? Start with our essential router bit set.

How many different picture frames can I make?

The possibilities are effectively unlimited. By varying which profiles you combine, their order, and the frame proportions, the eight bits can produce dozens of distinct frame and molding styles.

What else do I need to make picture frames?

Besides the bit set and a router table, you'll want a way to cut accurate 45° miters and clamp the corners. See our clamping collection for frame and corner clamps, and our measuring and layout tools for precise miters.