3-Pc. Planer's Package for Routers
If you have a workpiece that's just too large for your existing planer and jointer, there is still a way to make relatively quick work of your milling nightmare. This kit has everything you need to flatten large wooden slabs and all manner of woodworking projects!
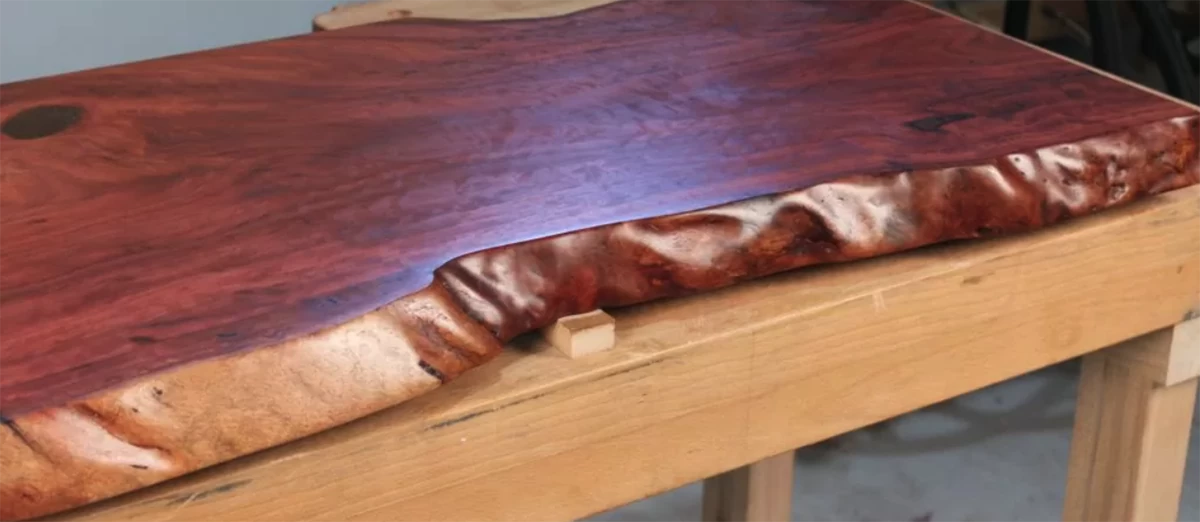
With the live-edge slab flattened (Part 1), the real question is what to do with it? In my case, I decided that the slab is well-suited for a long, narrow table such as a buffet or sideboard in a dining room or, a sofa table. My slab, while a nice wide 32" at one end tapers at the other to a relatively narrow 18". From a design standpoint, this presented a problem for keeping the slab whole, and in the end, I decided it was best to cut the slab down to make a long slender top measuring roughly 19" by 66". This dimension provided for a live edge down the full length of one side and a small section of live edge on the other. It also allowed me to remove some defects at both ends when cutting the slab to length.
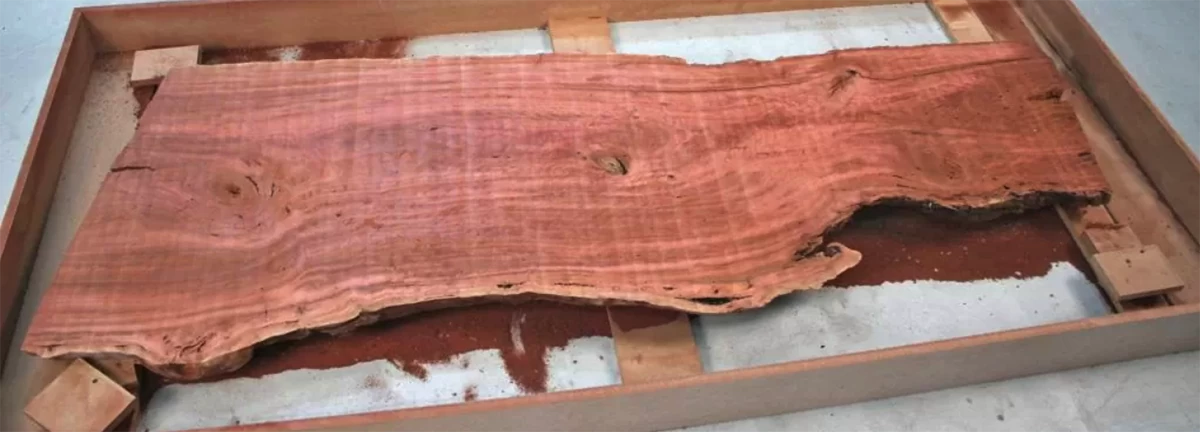
As far as the design goes, I decided to draw inspiration from the Shakers and create a simple base for the table. I wanted to make sure that the tabletop was the star of the show and that the table would fit in with a modern or traditional decor. I'll talk more about the base later.
The first step is to trim the slab to final size. For this I used a 7-1/4" circular saw with a strip of MDF used as a straightedge guide. I actually used pieces from my planing sled as my straightedges for cutting the slab to final size. To hold the straightedges in place and secure the slab to the workbench, I used good, old-fashioned handscrews. (You do have a set of handscrews in your shop, right?)
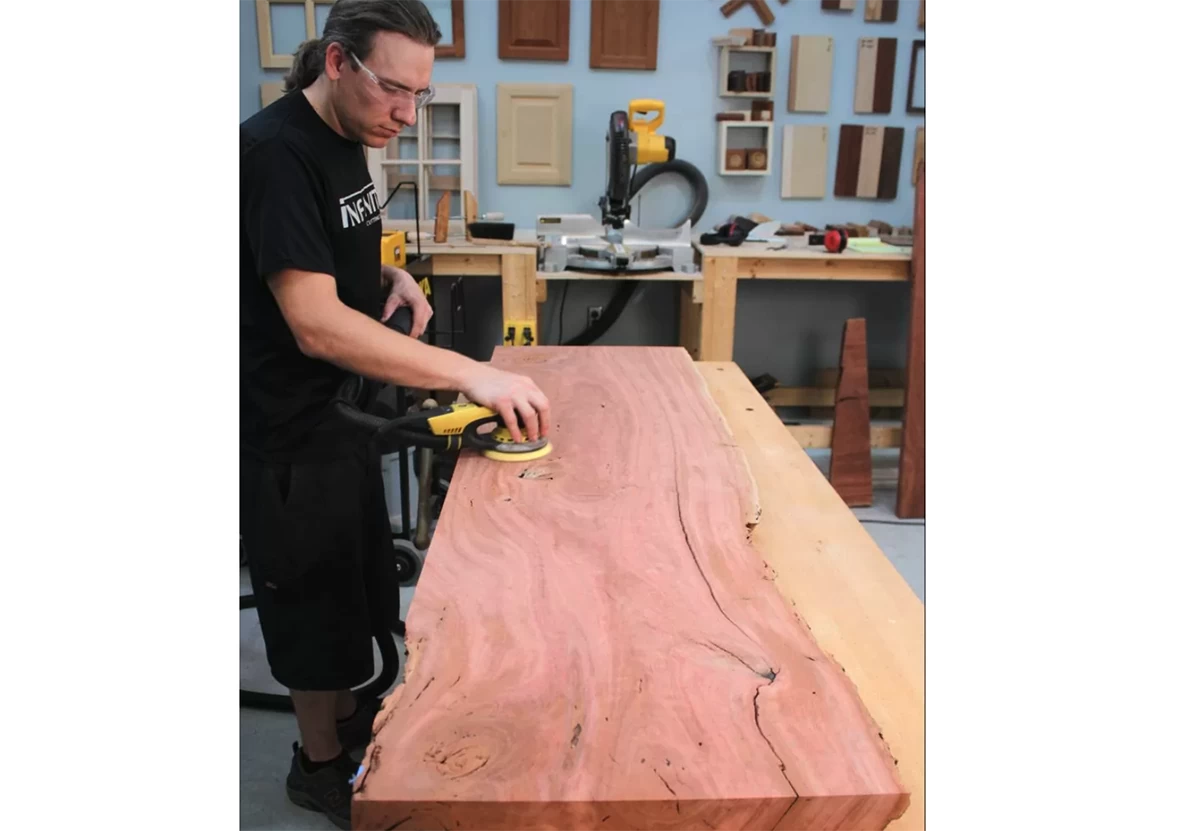
With the slab cut to size, getting it ready for finish requires a few steps. First, I like to start with a rough sanding to eliminate any witness lines from the Mega Dado & Planer router bit used in planing process. It's important at this step to be careful to keep the slab flat by not letting the sander dig in and cause low spots. The goal is a nice, smooth surface with no hills and especially no valleys. A good sander is a must. I have used a lot of sanders — both electric and pneumatic — in the past and the Mirka Deros sander is easily my favorite. The Deros with the Mirka dust extractor (also available as a complete Deros system) is the most dust-free sanding system I have seen. And honestly, I'm not sure that a better system could be made. When using Mirka Abranet sandpaper with the Deros system, dust is simply not a concern. While doing this initial sanding, I'll inspect the slab top and bottom. In this case, I actually decided to flip the slab and use the surface I had originally thought would be the bottom of the table as the top.
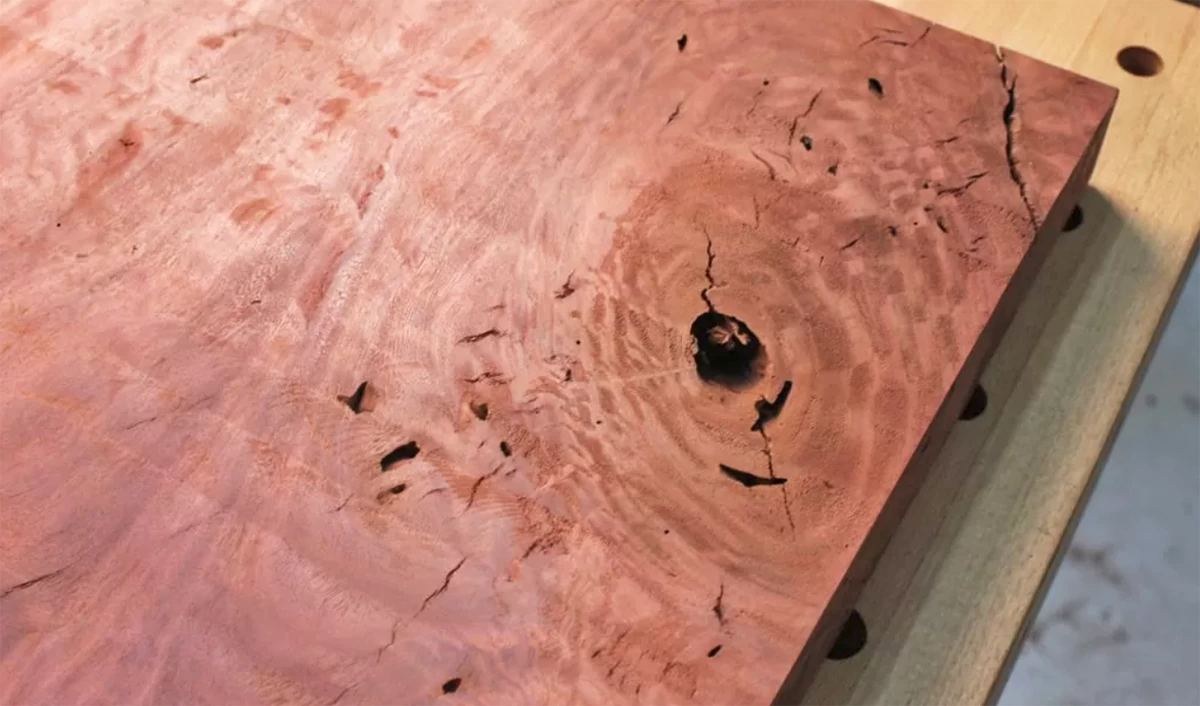
In my experience with working with large slabs, voids, checks, and other defects are part of the game and honestly, give a slab its unique personality. I've found that filling the voids with epoxy is the best way to deal with these defects. The epoxy creates a smooth surface without taking away the character of the piece. In some cases, clear epoxy may be okay, but I prefer to color the epoxy to create a natural-looking filler. For my slab, I mixed some walnut sanding dust into the epoxy to add color. The walnut dust makes for a nice, warm, dark brown color. If you use a black dye, the epoxy often ends up with a blue tint that appears unnatural to my eye. I don't use so much dust that the epoxy turns muddy. I add just enough to add color and create an epoxy that has a little depth once it cures.
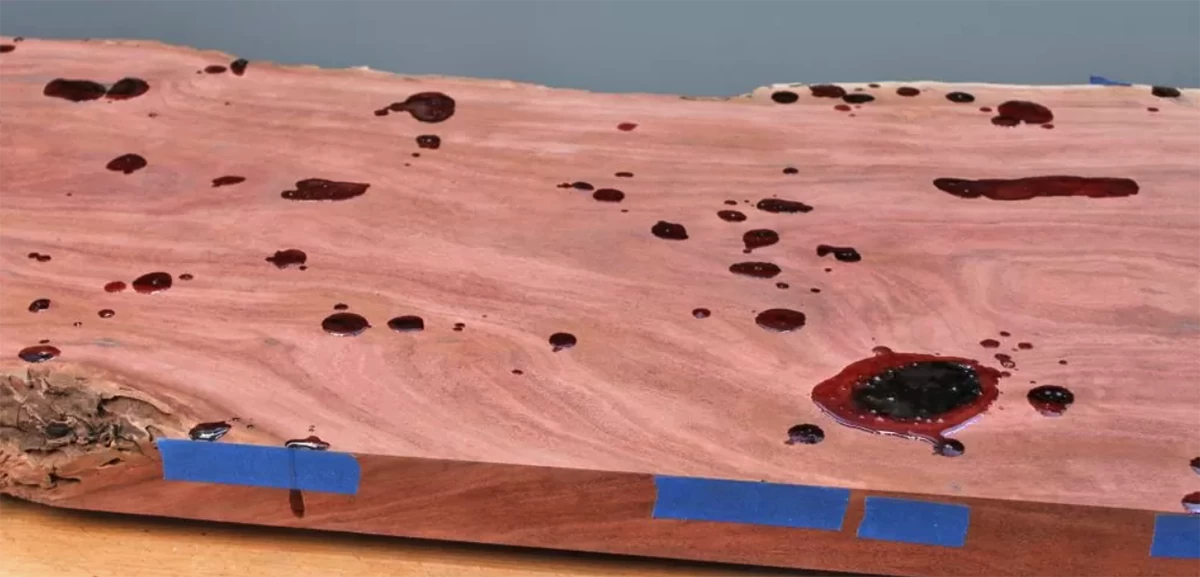
If I have voids that extend to the edges of the slab, I tape them with blue painter's masking tape to keep the epoxy from leaking out and to help maintain a flush edge. The epoxy is very good at finding its way through the slab so I'll usually tape any voids on the bottom of the slab, as well. Pouring takes some time and often requires more than one batch of epoxy. I keep a heat gun or blow torch handy to cause the bubbles to expand and pop, leaving a nice smooth finish. I do my best to not end up with thick globs of epoxy on the surface but excess epoxy is inevitable.
I've found that a card scraper is a perfect tool for removing the excess epoxy after it cures. It does take some time but I find I have more control with the card scraper than I would with a belt sander. The last thing I want to do is gouge the slab and create a hollow because it will definitely show when the finish is applied. The card scraper helps ensure that the slab stays as flat as possible so that I don't spend too much time sanding in one spot.
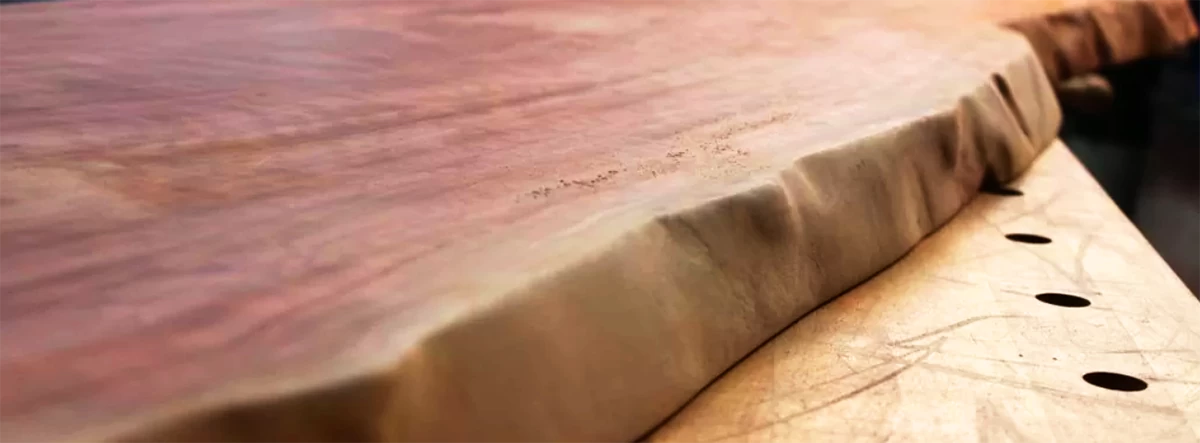
With all the voids filled and excess epoxy scraped away, it's time to sand. I once again start at 80-grit and work my way up to the desired finish. How much to sand depends on the type of finish you plan to use on your projects. Many manufacturers of film finishes, like polyurethane, discourage sanding beyond 220-grit for reasons of adhesion.
Several years ago I started using Odie's Oil on all of my projects and I'll say that I'm not going back. My favorite thing about Odie's Oil is that I can sand to whatever grit I want without being concerned about adhesion because the finish soaks into the fibers of the wood. I've used Odie's finishes on everything from floors to guitars. A lot of people I talk to hate sanding and think I'm crazy, at first, but in my experience, all the hard work is done by the time you get to 220-grit. From 220-grit, the process moves quickly and I find there to be a sweet spot at 600-grit where the scratches left by the paper seem to disappear and the subtle figure and grain of the wood begins to pop.
I'm a big fan of Mirka Abrasives and have used them in my own shop for years, I use the Mirka Abranet disks for power sanding. For hand sanding I like Mirka Gold sheets. The Gold is long-lasting and seems to resist clogging. For finer sanding in the 1000+ grit range I go to the Mirka wet/dry paper. The nice thing about Mirka Wet/Dry sandpaper is it's available up to 2500-grit so it doesn't matter if you're sanding bare wood or sanding and buffing out lacquer. There are plenty of fine-grit options.
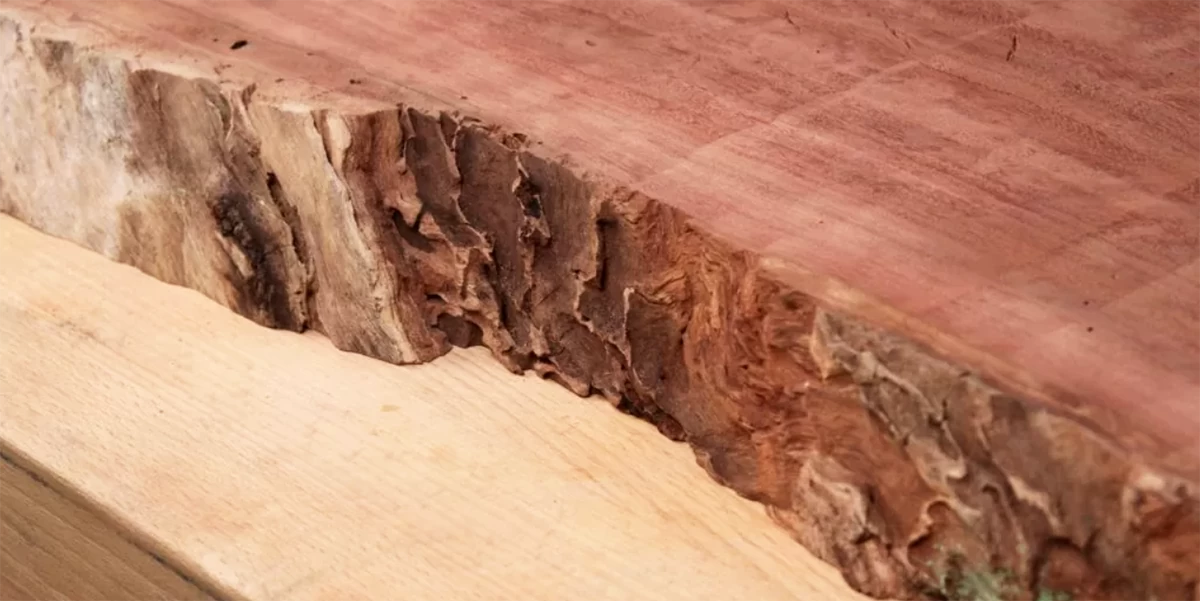
Shaping and sanding the live edge is where most people get nervous. This is a part I really enjoy because I get to decide how much work I want to do. Some people want to keep the bark intact, but I have yet to come across a piece with bark fully intact so I opt to remove the bark entirely. I've talked with a few woodturners that specialize in live-edge work and all seem to agree that the bark will come off at some point no matter what you do. There are lots of methods for removing bark and smoothing the edge, including using a wire brush, abrasive pads and balls, and the good old disk sander. I typically go for the latter with some 80-grit sandpaper and go to town. Unlike sanding a flat surface, I follow the contours and try to preserve the natural shape of the edge while getting everything smooth. If I find a soft spot that wants to cut fast, I let it. The same goes for hard spots being allowed to stick out. If there's damage to an edge, I try to shape and smooth the defects to make a natural-looking edge. With the rough stuff gone, I switch to hand-sanding and work my way through the grits. This is where the unnatural lines and creases blend in and reveal the natural edge I want. This method leaves a natural edge that is smooth and invites people to touch.
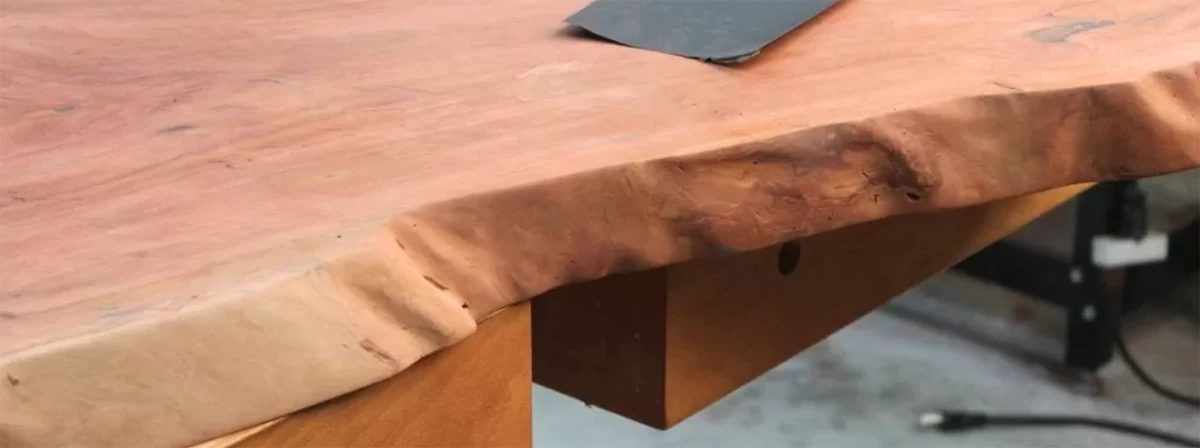
For all of the cut edges, I decided to add a simple 1/8" radius roundover, using an Infinity 38-190 1/8" radius roundover router bit. I like an 1/8" roundover because it allows the edge to still have some definition where a larger radius can muddy the edge. I'm also a big fan of using a chamfer on cut edges. I find the chamfer adds an extra surface to reflect light just like a diamond. If the edge is straight and consistent, a simple chamfer can really make a big difference on the right piece.
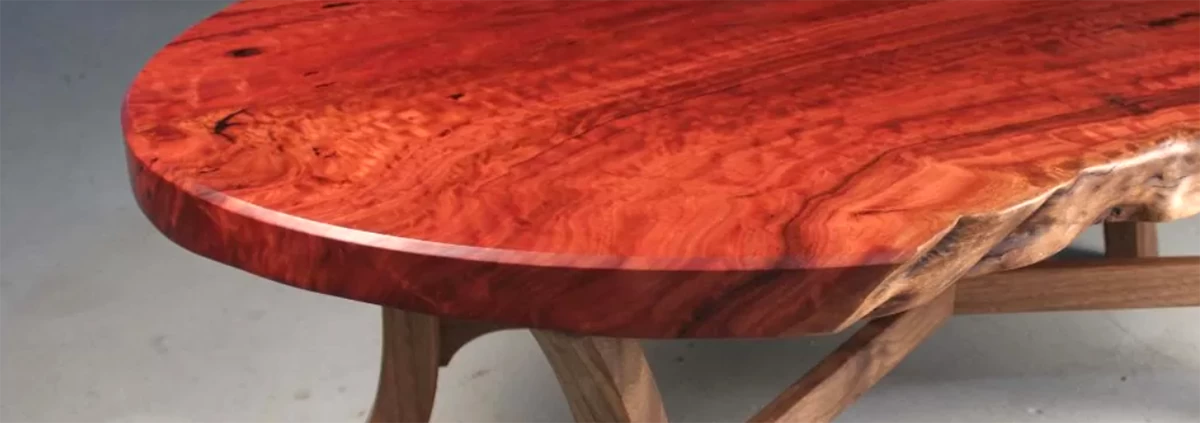
One important tip I try to follow when sanding the live edge is to make sure I don't round the lines where the live edge meets to surface of the slab. I want there to be a hard line to show where the live edge ends and the cut surface begins. This goes for any sawn surface. I find this is best done by sanding the live edge before doing my final sanding to the top. While I don't want a sharp edge where the two surfaces meet, I do want there to be an edge to reflect light. Take a look at the photo below and I think you will see what I mean.

With everything sanded, I grab a jar each of Odie's Oil, Odie's Wood Butter, and Odie's Wax. I like to start with two to three coats of Odie's Oil, then two coats of Odie's Wood Butter, then finish off with two coats of Odie's Wax. The key with all of these finishes is to apply a light film. There are no solvents in them, as in a polyurethane finish or other finishes, so nothing will evaporate. I use a cotton rag (an old T-shirt works great) to wipe and rub the finish into the wood.
I don't get in a hurry with this process because I want the finish to be worked into the surface of the wood. If I find a thirsty spot, I'll add more finish. My goal is to work as much of the finish into the wood, then let the wood soak up the rest. After 45 minutes to an hour, buff all the remaining finish from the surface. I want to get as much of the finish off of the surface then let it dry. I follow this same process for both Odie's Oil and Odie's Wood Butter. Less and less finish will be needed with each coat so I'm careful not to use too much. Remember, there's nothing in the finish that will evaporate so you need much less volume of finish for each coat. While I have no problem doing all the buffing by hand, I'll break out my power buffer to both spread and buff the finish into the surface.

Odie's Wax is my favorite of all furniture waxes. I apply a small amount to a rag and buff a thin coat onto the surface. It's as if I am trying to stretch the finish as far as I can. This prevents me from applying too much wax. All of the Odie's finishes come in glass jars for a reason. Plastic and metal containers can let oxygen through to the finish and let the finish set up, reducing the shelf life. The glass jar helps prevent this to extend the shelf life of the finish. I have a jar of wax in my cabinet that is over 3 years old. The reason I'm telling you this is a thick coat of wax will take longer to cure. There are also no solvents in Odie's wax to flash off so you actually get what you're paying for.
With the wax applied, I'll either let it set for about 30 minutes or simply grab the buffer and work it into the wood. After about 30 minutes I buff anything left from the surface and let it cure. If I want a second coat I'll let the first application cure overnight or at least eight hours. Finally, I give the wax about 3 days to cure and buff one last time before putting the piece to use.
Remember I said we would talk about the base of my table later? I think we'll have to wait for Part 3. Stay tuned.


